Blog Archives
Storm Damage Resources

Field flooding occurred in newly planted and newly emerged fields throughout the area after recent rains.

Large trees were uprooted falling on buildings, homes, and cars in Sutton after the May 11, 2014 tornadoes.
The Mother’s Day 2014 storms caused significant damage in Clay County and other areas of the State. It never ceases to amaze me how people throughout the area respond to storm damage! Clay County has had its share, and yet the attitude of those affected has been one of thankfulness-thankfulness that no one was injured and that so many still have their homes in spite of damage. It’s also wonderful to see people from all over the County and area pull together with each storm-helping each other out bringing themselves and equipment to pick up debris or help however possible. It’s a blessing to work with and serve the people of this County!
Resources
As clean-up continues, the following are a list of resources that may be helpful to those affected by the storms. Thoughts and prayers go out to all who were affected!
- Numerous Tornado Damage, Recovery, Cleaning, Decision Making resources (scroll to Recovery portion in middle of page)
- Tips for Early Tornado Damage Recovery
- When to Save and Throw out Frozen Food after Power Outages
- When to Save and Throw out Refrigerated Foods after Power Outages
- Flooding and Corn Survival
- Flooding and Soybean Survival
- Evaluating the Need to Replant
Proper Tree Pruning
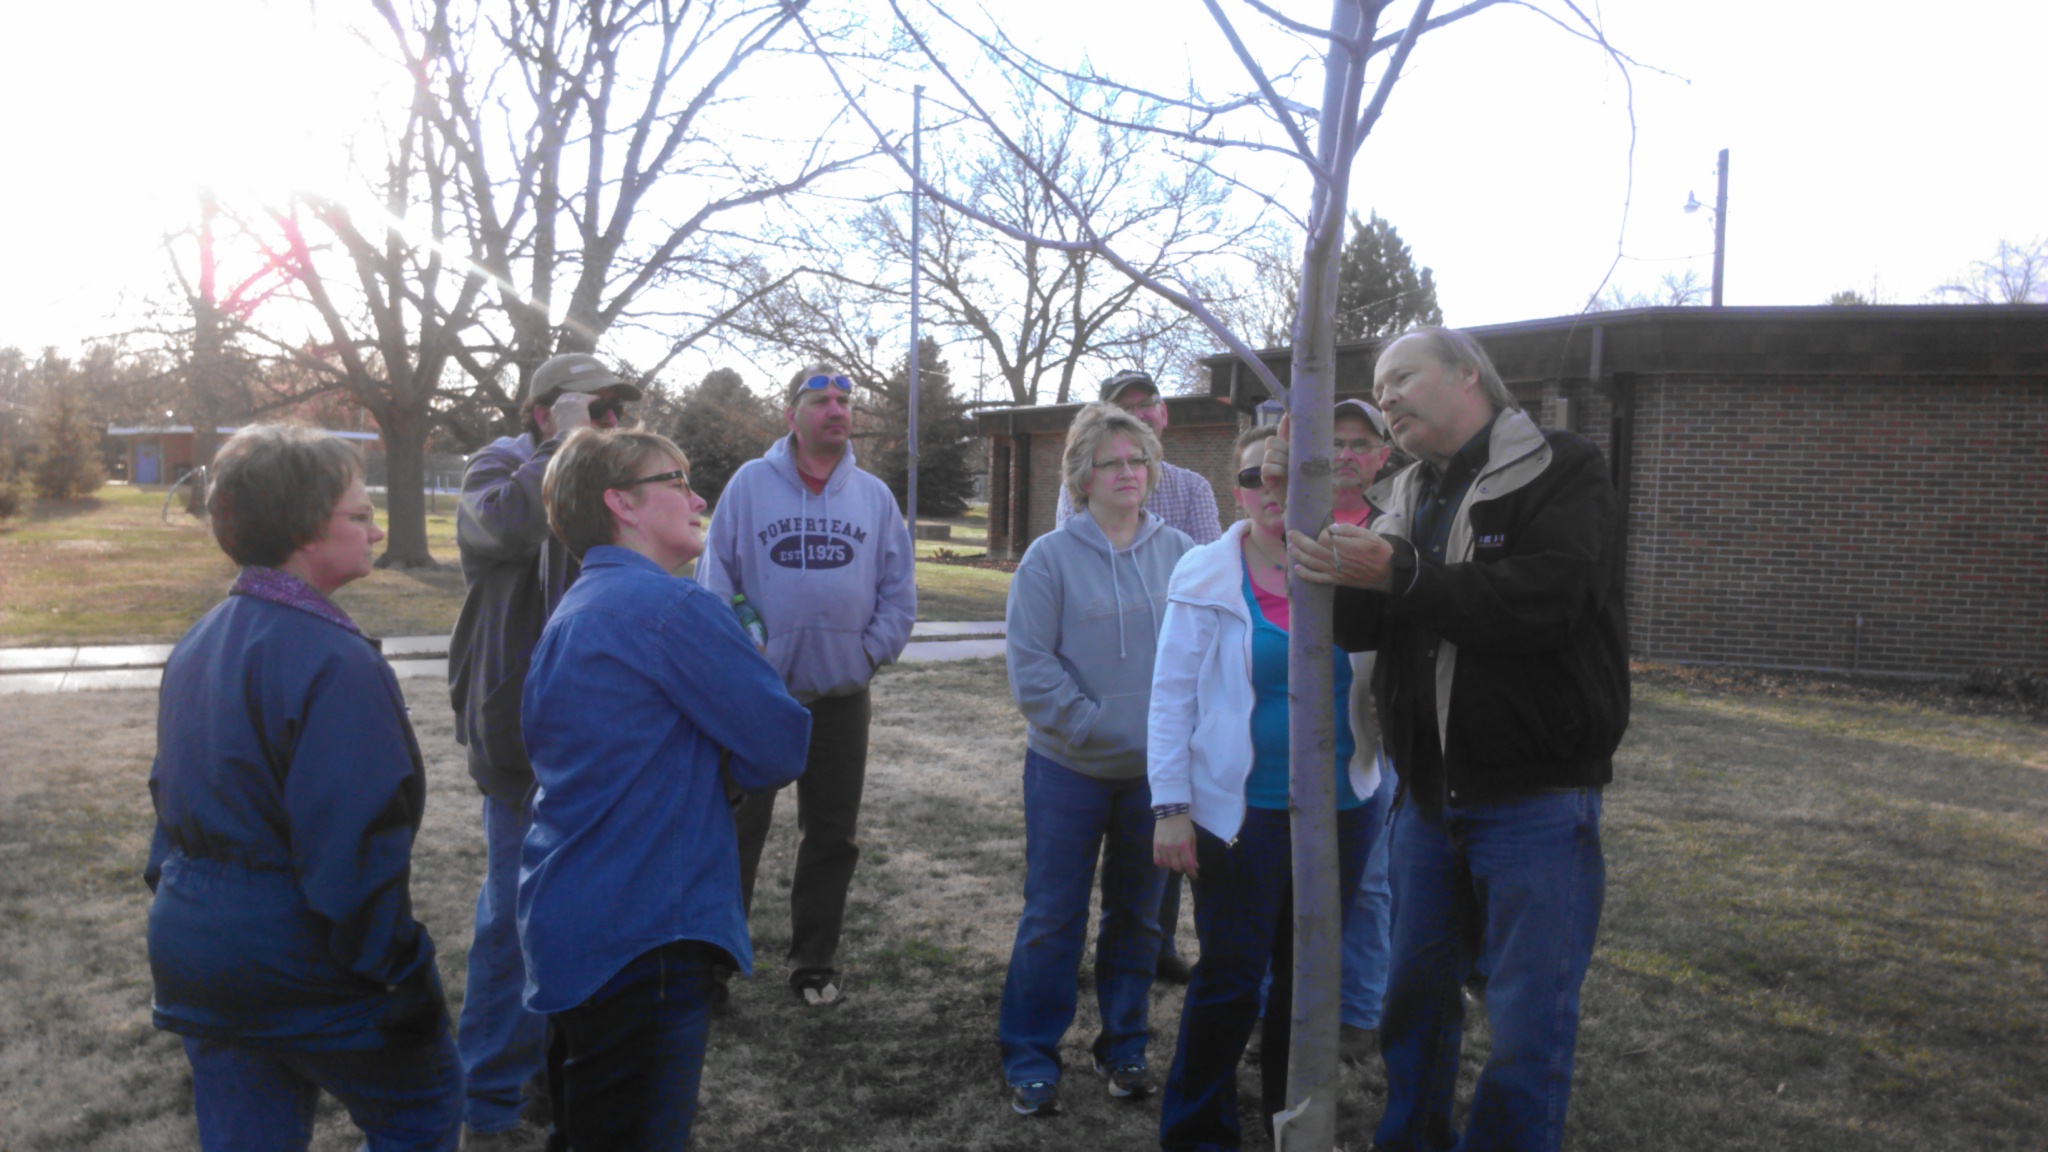
Special thanks to Dr. Scott Dewald for the wonderful evening of information he provided at our tree care workshop last week!

Scott Dewald explaining what to look for when considering pruning a tree. Scott shared that one should never prune more than 1/3 the height of a tree in one season. Pruning should also be done to obtain a main leader and overall structure. It’s also best not to prune limbs more than 2″ in diameter. If the limb needs to be pruned but it encompasses more than 1/3 of the limit of what should be removed in a season, one could “head” the limb by removing a portion of it one year and then complete the cut the following year. This will slow the growth of that limb.
Pruning cuts should always be made at the “bark collar ridge” which produces a round cut and allows the tree to naturally heal. Scott shows attendees where the bark collar ridge is on this branch.
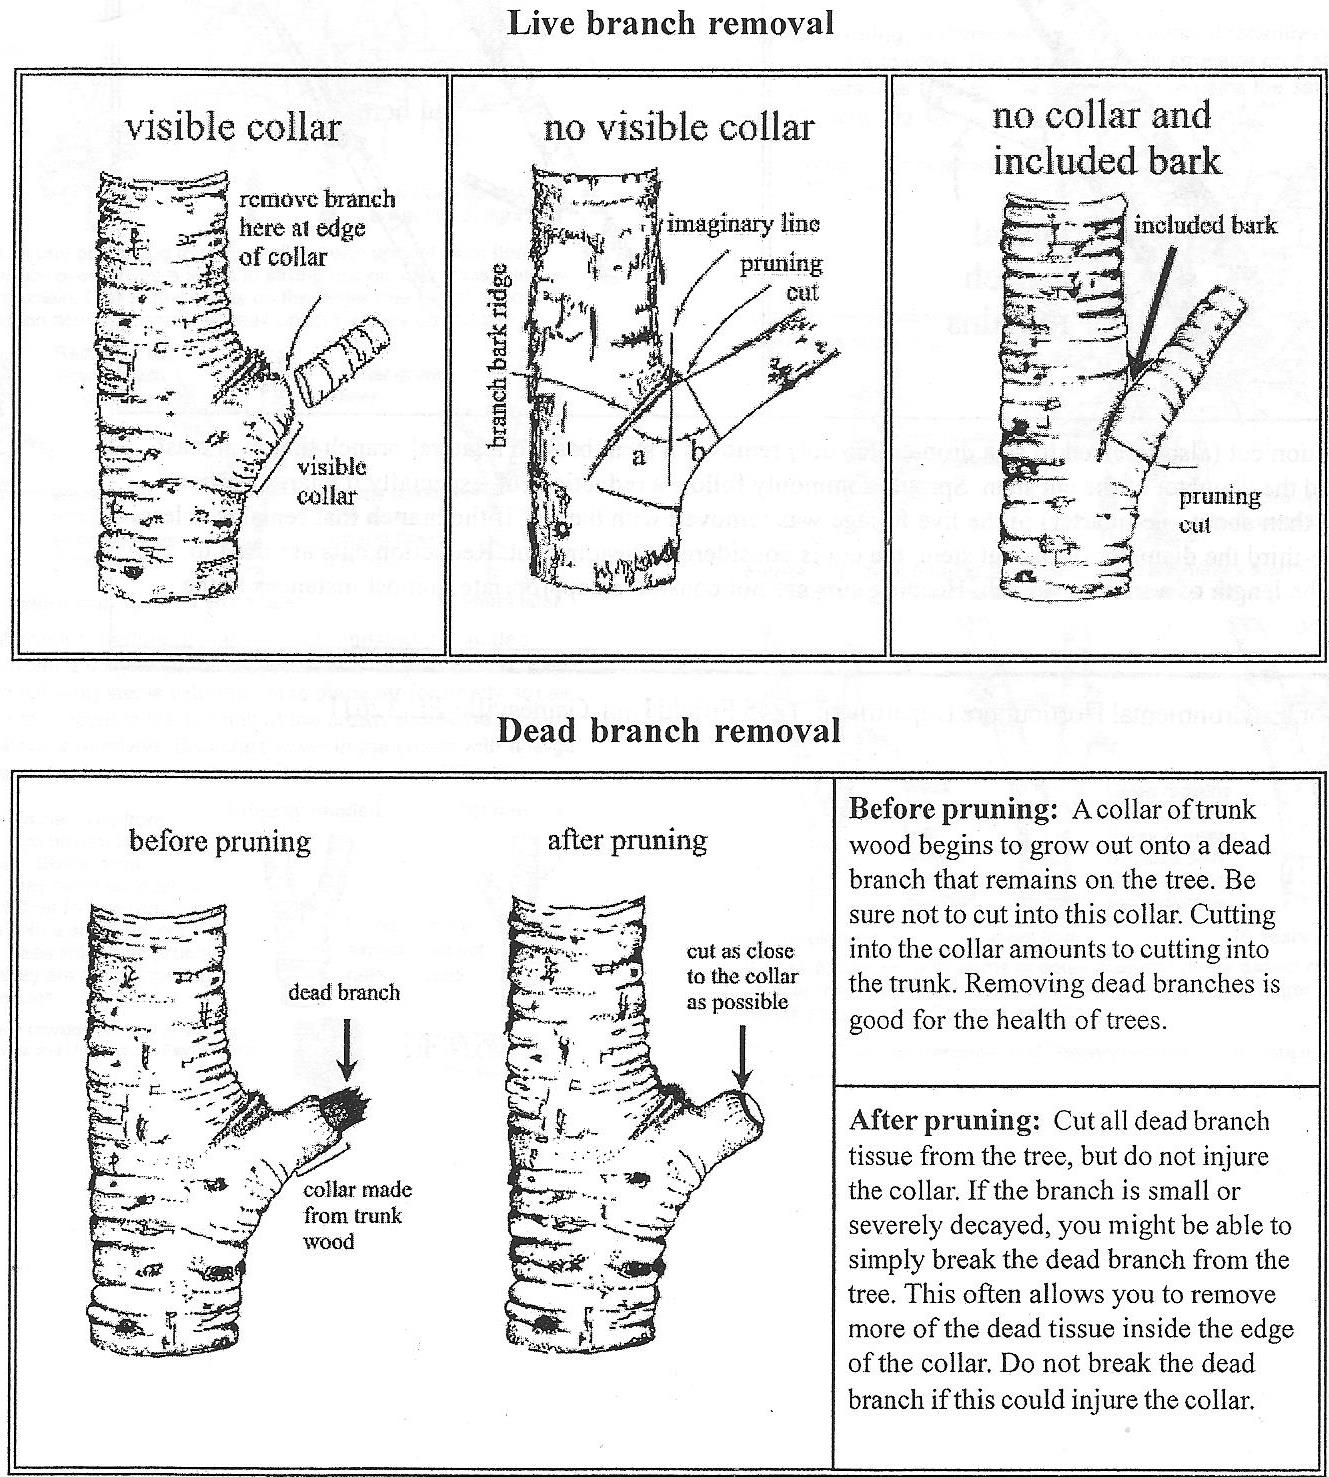
Pruning Fact Sheet ENH847 from University of Florida Extension written by Edward Gilman with good visuals of where proper pruning cuts should occur.
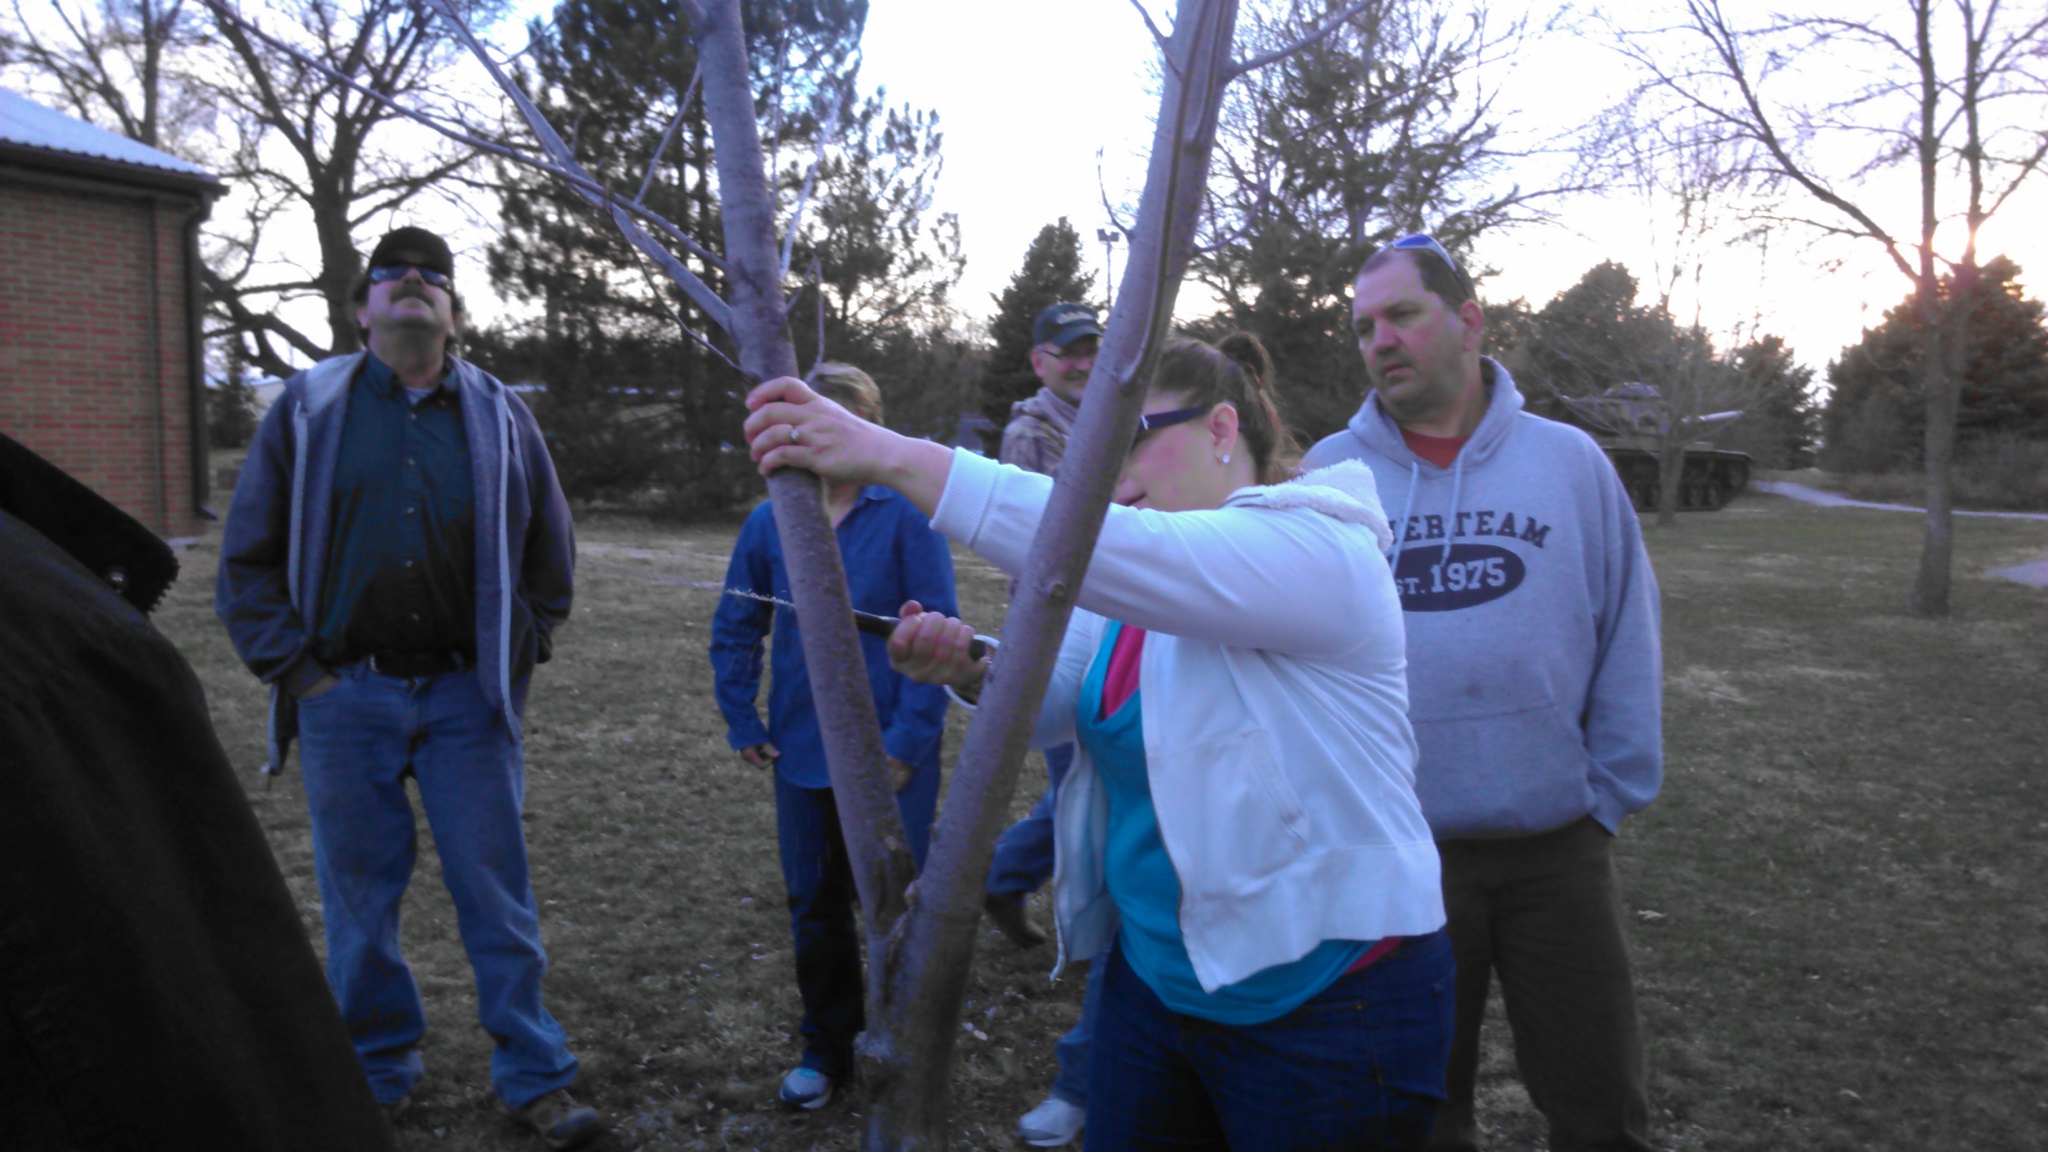
We learned that on large branches, it’s good to make a cut farther out to remove the weight first, and then go back and make the proper cut at the bark collar ridge. Improper pruning can result in further damage to the tree. Here we were trying to correct this tree for not having a main leader. Typically one would leave the southern-most branch according to Scott, but in this case, the northern-most branch was stronger. Scott said there was no need to stake the tree or try to get the northern-most branch to straighten out as it would naturally do this in time on its own.

After a large part of the branch weight has been removed, this attendee is now making the proper cut at the bark collar ridge.
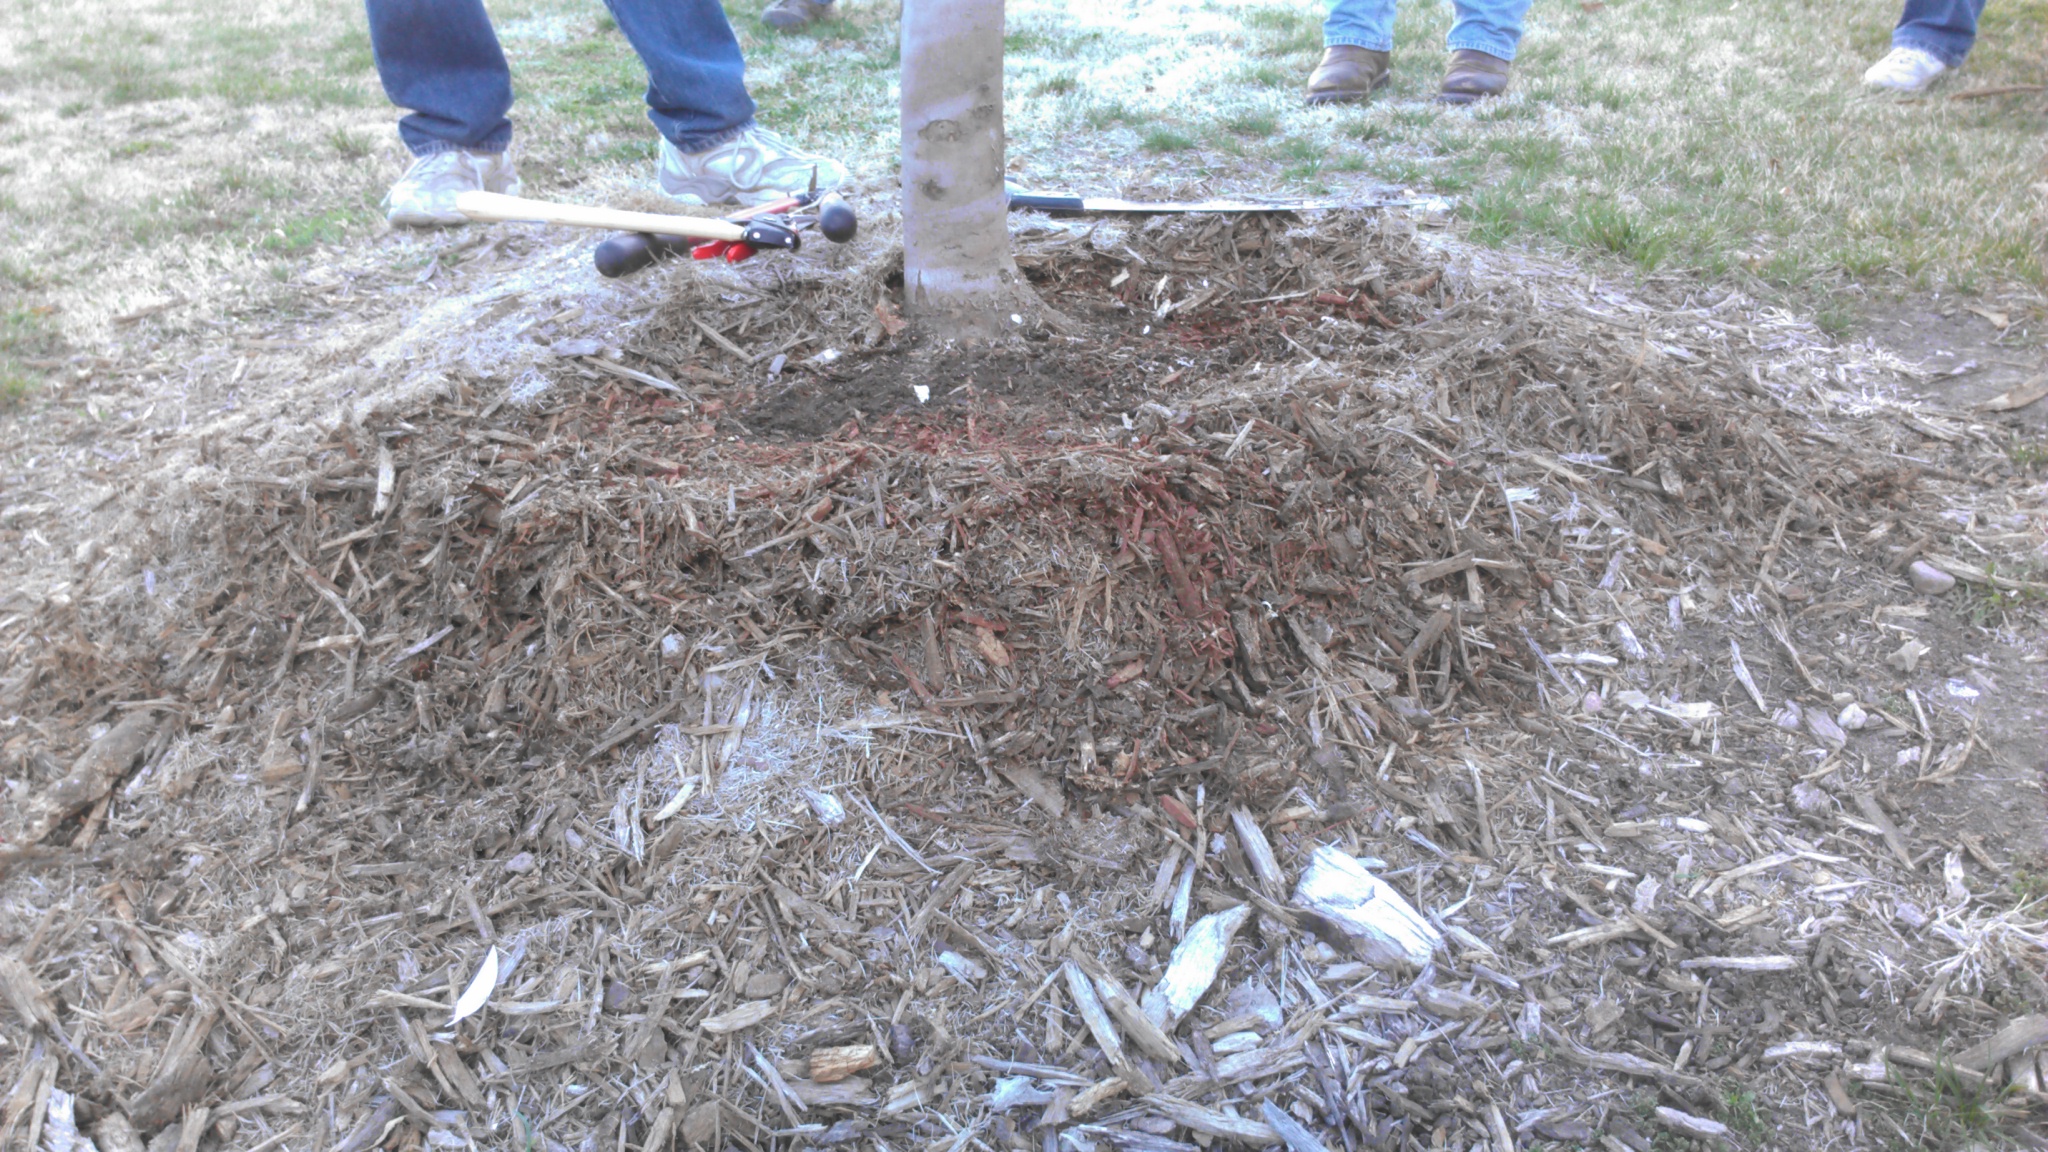
We also walked from tree to tree in the park looking at additional problems. I noticed how high the mulch was piled on some of the trees. Mulch should never be placed against the base of the tree as it can cause rot. But in this case, it was observed that the person who planted the tree did not dig a deep enough hole. What appeared to be a pile of mulch was the actual root ball and soil mounded up above ground.

This situation also most likely was a result of improper planting. In this case, the tree roots began wrapping around the base of the tree girdling it (like choking it).

This is the most common problem I see with tree calls. A huge enemy to trees are weed whackers! In this case, you can see extensive damage to the bark and the base of this tree. Depending on the damage and how well the tree can seal the wound will depend on if the tree will survive or not. Often, as in the case of this tree, the tree will be weakened with few leaves appearing on branches. It’s best to place mulch around trees in order to avoid having to use weed whackers on them-but again, don’t place the mulch up against the base of the tree!
This was a fun workshop for me with the right size of group and great hands-on demonstration where we also learned from pruning mistakes and how best to correct them. Thanks again Scott!
Tree Care Workshop

The Memorial Day and August 1st storms of 2013 did significant damage to our trees in Clay County. This workshop is designed to provide demonstrations on pruning techniques, what to look for, and learning how care for your storm damaged trees in future years. There is no charge and all are invited to attend. Please spread the word as many trees were damaged last year!
What do Mycotoxin Levels Mean?
Last week I was receiving text messages from a few of our farmers about corn harvest results from damaged corn. Low levels of mycotoxins are being detected in samples thus far, thankfully.

A reminder, the presence of mold does not automatically mean a mycotoxin is present. The fungi producing mold have the potential to produce mycotoxins.
Here’s What the Numbers Mean…
For aflatoxin, the U.S. Food and Drug Administration has set a recommended limit of 20ppb (parts per billion) for dairy animals, 100 ppb for breeding animals, and 300 ppb for finishing animals. To put this is simpler terms, a sample would need 20 affected kernels out of a billion kernels to be at the legal limit for dairy animals. So far, most samples are coming up at 5-6ppb which is very low.
For fumonisin, 20ppm (parts per million) is the recommended limit set by FDA for swine, 30ppm for breeding animals, 60ppm for livestock for slaughter, and 100ppm for poultry for slaughter. So, this would mean 20 affected kernels in a million kernels could cause a problem for swine. Again, our levels are averaging closer to 5ppm right now which are low.
Deoxynivalenol (DON) also known as vomitoxin is another mycotoxin being tested from grain samples. This mycotoxin causes reduced weight gain and suppresses animal feeding, especially in swine. Concentrations greater than 10ppm can result in livestock vomiting and totally refusing feed. FDA has recommended that total feed levels of DON not exceed 5 ppm for cattle and chicken, and 1 ppm for swine.
It is very important to sample from several places in the grain to get an accurate sample for damage and mycotoxins. It is also very important that black light tests are not used to determine the presence or absence of mycotoxins. Some of these mold fungi produce a compound that fluoresces under black light, but research has shown that this quality does not consistently predict the presence of mycotoxins (often provides false positives). Finally, before any of your storm-damaged corn is put in a bin, call your insurance agent out to get a sample!
Protecting Your Health with a Mask
There is some great information from the University of Nebraska Med Center on what types of masks to use to protect your health from molds and potential mycotoxins. Some people tend to have more sensitive immune and respiratory systems than others, so I’d highly recommend checking out these short videos.
Feeding Storm Damaged Corn; a Few Thoughts from a Veterinarian
With the recent sprouting of grain on the ears and with more producers now learning what percent loss their crop insurance is determining for each field, I felt it would be good to talk about feeding this damaged grain again. This post is written by Dr. Dee Griffin, DVM at UNL’s Great Plains Veterinary Education Center at Clay Center. I appreciate Dee’s willingness to provide this information from a Veterinarian’s perspective. 
Also a note, to date we have not found Aspergillus in our hail damaged fields. The grain molds we are seeing are Diplodia and Fusarium. Diplodia does not have the potential to produce mycotoxins. Fusarium has the potential of producing fumonisin, vomitoxin, or DON. You can bring forage samples to Husker Harvest Days this coming week to the IANR building and have them tested that day for nitrates for free if you wish.
Dr. Griffin writes: Any time a growing grain producing plant is damaged there is a potential for changes in the plant or grain on the plant contaminated with fungus/molds to grow. The most common change in stressed plants is the accumulation of nitrates. Aspergillus or Fusarium will be the most likely fungi to be contaminating harvested grain from storm damaged corn in our area.
It is really important to know that most molds are not toxic. Therefore just because mold growth is observed doesn’t mean the feedstuff will harm livestock. Even though a mold may not be toxic it can still cause feed refusal. Not all livestock species are equally sensitive to mold contamination and not all production groups are equally sensitive. For instance pregnant and young animals are more sensitive than mature non-pregnant animals.
Nitrate accumulation in stressed plants can cause be harmless or cause serious harm depending on:
- the level of nitrate in the feed harvested from stressed plants,
- on the life stage of the animal,
- and on the species of animal.
Nitrates accumulate in the forage portion of the plant, so nitrates are not a concern in grain harvested from stressed plants. Additionally, it is important to know nitrate levels will always be highest in the bottom part of the plant and lowest in the top foliage. Nitrate testing is simple and reasonable quick. Your local UNL Extension Educator can help you locate the nearest facility that does forage nitrate testing.
Feed containing nitrate levels less than (<) 1000 parts per million (ppm) seldom are associated with an animal health concern. Feed containing nitrate levels greater than (>) 1000 ppm may be a concern in younger animals and levels >2000 ppm should not be fed to pregnant cattle. Feeder cattle are reasonably resistant to nitrates but feeds containing >4000 ppm should not be fed to any animals.
Molds in corn grain of concern could be either Aspergillus or Fusarium. Your UNL Extension Educator can be a great help in identifying mold growing on ears of your storm damaged corn before the grain is harvested. Both of these fungi are potentially dangerous when found in livestock feed. Toxins produced by molds are extremely stable, therefore if a significant level is found, the level will not decrease over time. Silage produced from damaged plants and grain harvested from mold infested plants is potentially a problem.
Good silage management is critical to lessen the likely hood of continued mold growth after ensiling. Proper packing to remove oxygen and improve fermentation which ensures the pH will be below 4.5 is critical.
You can’t look at harvested grains from storm damaged fields and visually identify mycotoxins. Corn grain from storm damaged fields can … and mostly likely should … be tested for mycotoxins before feeding to livestock. Your local UNL Extension Educator, nutritionist or veterinarian can help with mycotoxin testing.
Proper sampling is crucial to getting reliable results back from the laboratory. A “grab sample” is not adequate. The sample submitted to the lab should be representative of the entire load, bin, pit or pile of feedstuff being evaluated.
The steps are simple
- If sampling a field before harvest, sample at least two dozen ears that appear to have mold growth and submit all the ears to the laboratory for mycotoxin evaluation
- If sampling after harvest, take multiple samples uniformly from throughout the silage or grain in question
- The sample should be taken from what would be used in a single load of feed
- That means, if five loads of feed could be made from a 50,000 lb semi-load of corn, collect not less than five samples from the semi-load of corn
- The sample should be based on sample volume not weight
- For instance, collect “coffee can” size samples
- Mix all the all samples together that were collected from the feed in question
- For instance, if 10 coffee can size samples were collected from across the face of a silage pit, pour all 10 samples onto a plastic sheet and thoroughly mix them together
- Next, collect a single sample from within the 10 mixed samples
- Submit the single sample to the laboratory
The laboratory results usually will provide some recommendations for how the feedstuff can be used. There is an old saying, “Dilution is the solution …” meaning in this consideration, that many feedstuffs that contain higher levels of mycotoxin than would be acceptable, might be usable if a sufficient amount of non-mycotoxin contaminated feedstuff is used to dilute the mycotoxin. Your UNL Extension Educator, nutritionist or veterinarian can help evaluate the possible uses of a damaged feedstuff containing unacceptable levels of a mycotoxin.
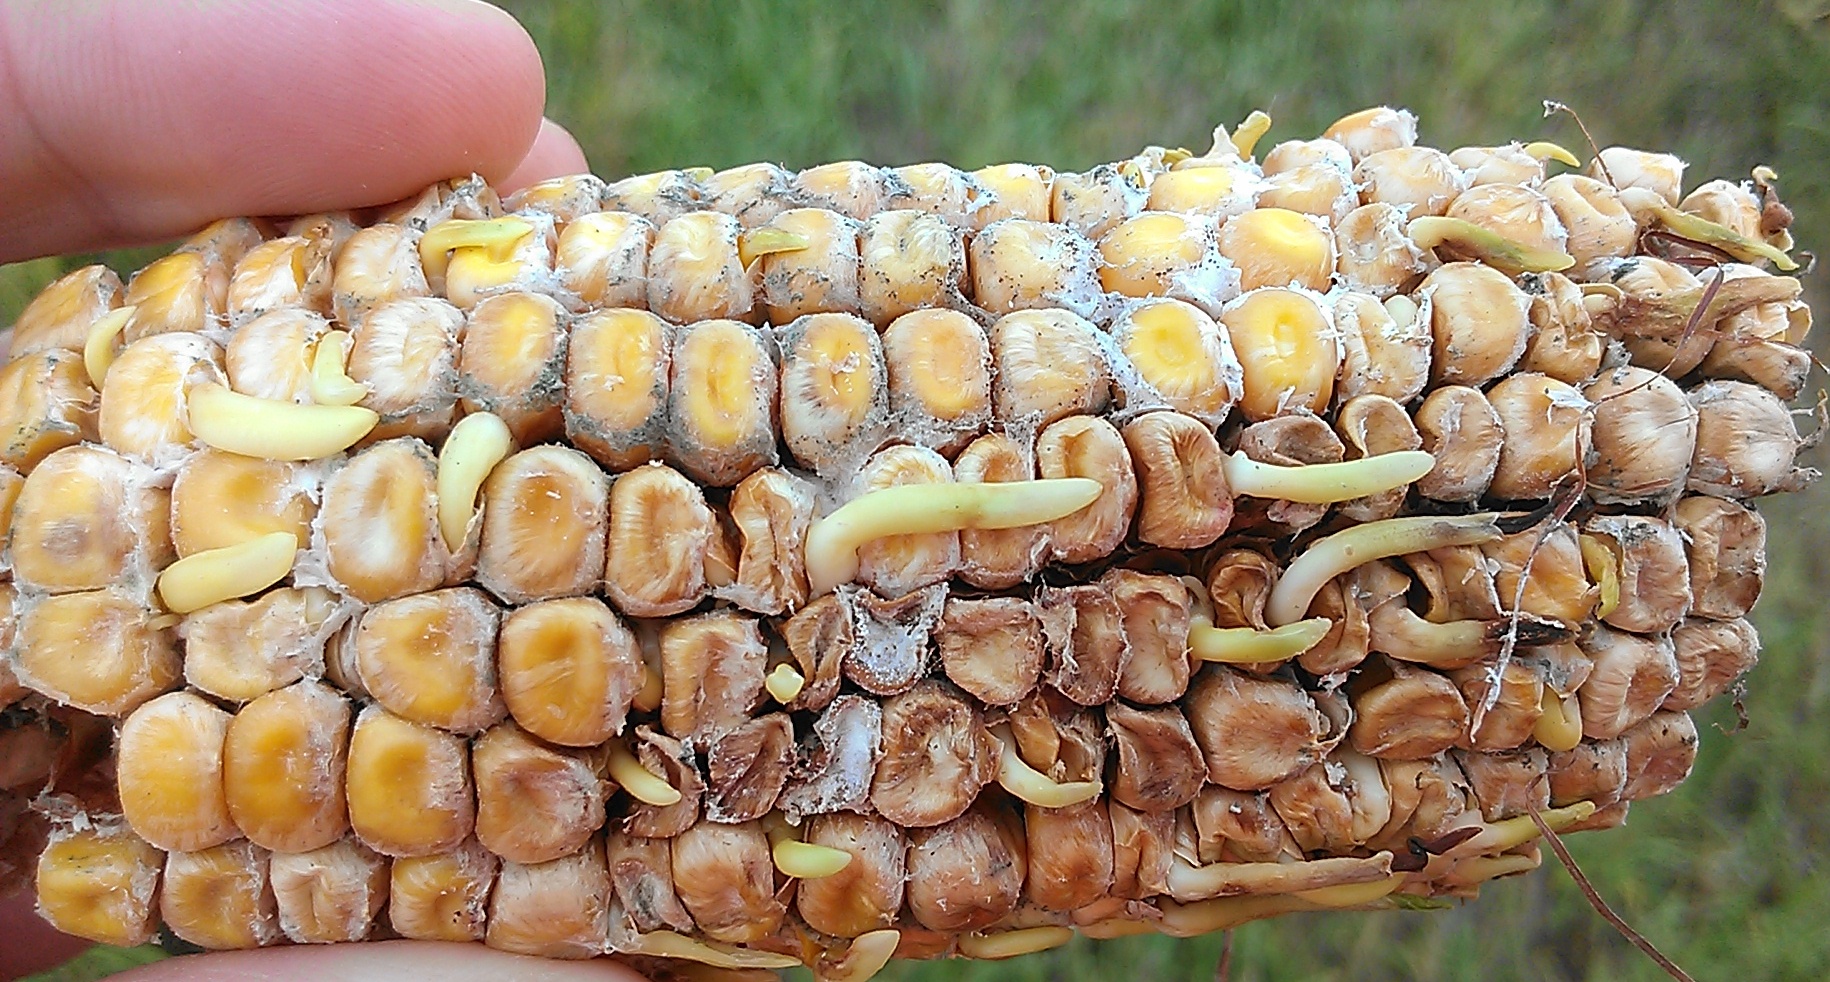
Sprouting Corn Kernels on Hail-Damaged Ears
The latest event in the Clay County storm occurring August 1st has become germination of “good” kernels left on the ears that have been damaged by hail. This event of kernel germination prior to harvest is also called “vivipary”.
Typically we wouldn’t see this occur before black layer because of the hormonal balance within the kernels-particularly the balance between gibberellin and abscisic acid. According to a study by White, et. al (2000), Gibberellin production with the lack of ABA allowed for kernel germination while less Gibberellin and more ABA deterred kernel germination. At full maturity, very little ABA is left in the kernel (in both corn and soybeans) which allows them to germinate in correct conditions after harvest. But this can also allow for sprouting in the ear after black layer when corn is still drying down, particularly in tight-husked, upright ears with conditions of high humidity or rain after black layer. Sprouting under those conditions typically occurs at the base of the ear first.
Why are kernels sprouting before we’ve reached black layer?
That’s a good question. I haven’t found much in the way of scientific explanation other than the thought that the hormonal balance of the kernels can be altered by physical damage from hail, bird feeding, and grain mold. Some ear mold fungi also produce gibberellic acid which can lead to a hormonal balance shift in these ears stimulating germination. I also haven’t observed that this is hybrid-dependent and am finding as much as 25-50% sprouted ears in various areas of hail-damaged fields.
What can you do now?

Make sure your crop insurance adjuster is aware of the situation and make sure to submit samples for kernel damage due to mold, sprouting, and check for mycotoxins prior to harvest.
The local co-op may or may not choose to accept the load depending on percent damage and the standards they need to follow. If the load is rejected, contact your crop insurance agent to determine your next step. DO NOT bin the grain on your farm until you contact your insurance agent as they have specific rules that need to be followed in the case of grain rejected due to mycotoxins or kernel damage from storms.
Sprouted kernels lead to higher kernel damage and more fines in a load. Keys for harvest will include harvesting early, getting corn dried down to 14%, potentially drying at a high temperature to kill the sprout, screening out fines, and monitoring stored grain closely for hot spots, mold, and additional sprouting grain.
You can also choose not to take it to grain right now, and honestly, that may be the best option for several of the hail-damaged fields. Silage is still an option and it would be recommended to sample the green chop going into the silage pit for potential mycotoxins. Mycotoxin level does not change with fermentation so cattle feeders would have a good idea of any mycotoxin levels if sampling was done in this manner. See this post for additional information on making silage.
Additional information:
Du-Pont Pioneer. (2007). Field Facts: Pre-mature Germination of Corn Kernels.
Nielsen, R.L. (2012). Premature Corn Kernel Sprouting (aka Vivipary). Corny News Network, Purdue University.
White et. al. (2000). Gibberellins and Seed Development in Maize. II. Gibberellin Synthesis Inhibition Enhances Abscisic Acid Signaling in Cultured Embryos. Plant Physiology Vol. 122 no. 4 pg. 1089-1098.
Wiebold, B. (2009). Wet Weather Can Cause Seeds to Sprout before Harvest. Integrated Pest & Crop Management Newsletter, Univ of Missouri.
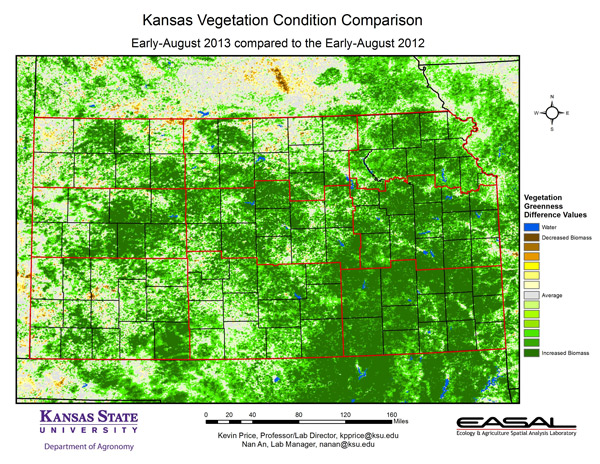
Extent of Storm Damage Visual
This map came from Kansas State University in a newsletter where they were talking about the vegetation differences from the Drought of 2012 to 2013 in Kansas. A colleague shared this with me pointing out how obvious the storm in Clay County, NE is on this map. Look above Kansas to the brown area-that’s the LOSS of vegetation we have right now in Clay County which is quite extensive-and neat how it’s captured unexpectedly on this map.
Forage Options After the Storm
Thank you to everyone who participated in the Town Hall Discussion on such short notice last week! It was cool watching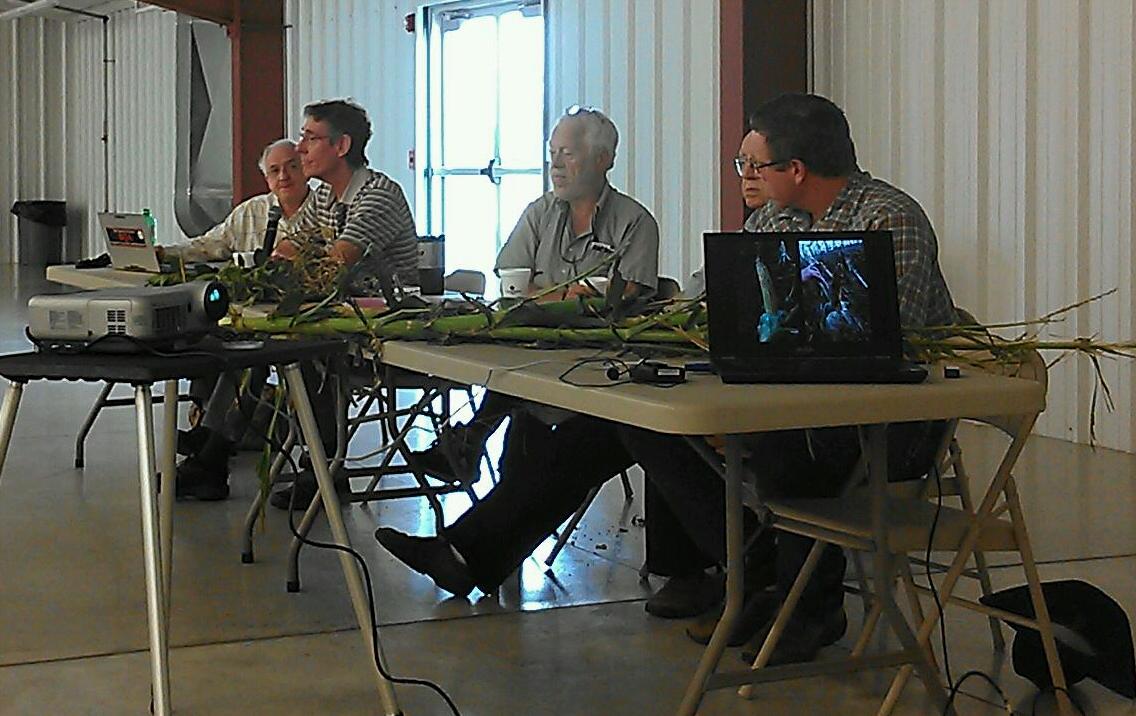 everyone come together to discuss the concerns at hand. Here’s a recap of some of the discussion regarding forage options. We also have provided numerous articles this week and will again next week at UNL’s CropWatch website. I will continue to post more about our local conditions on my blog.
Forage Options
Dr. Bruce Anderson explained that the best potential usage of storm damaged corn that won’t go for grain is to use it for silage. He stressed that the silage has to be made at the correct moisture and packed well-and that standing corn could be over 80% moisture right now. He mentioned the easiest and maybe the best way to lower moisture content is to simply wait until some stalks start to turn brown. This will also allow the surviving corn to continue to add tonnage. If waiting isn’t desirable, reduce moisture by windowing the crop and allow it to wilt one-half to one full day before chopping. You also could mix grain or chopped hay with freshly chopped corn to lower the moisture content. It takes quite a bit of material for mixing though — about 7 bushels of grain or 350 pounds of hay to lower each ton of silage from 80% to 70% moisture. When making silage, he recommended adding the inoculant during the chopping process to allow for proper fermentation.
He mentioned haying and baling were an option but that he was concerned about the amount of time it would take for the stalks to dry down at the current moisture. He recommended crimping the stalks if at all possible to help aid in the drying process. Be sure to test it for nitrates before feeding.
Grazing might be the easiest way to use damaged corn, and this is a good way to extend your grazing season. You might even plant some corn grain or sorghum-sudangrass or oats and turnips between rows to grow more forage for grazing if you can wait until late fall before grazing. Be sure to introduce livestock slowly to this new forage by feeding them before turning them in to reduce the chances of digestive problems. Also, strip graze the field to reduce trampling losses and get more grazing.
Shredding was mentioned as an option in some fields. Dr. Bob Klein observed two years ago in the wind storm out in western Nebraska that shredding of plant material led to piles after wind drifted loose material in the field. That made for a difficult planting situation the following year. Making earlage was also mentioned as an option.
Additional Resources:
- Forage Options with Damaged Corn
- Planting Cover Crops Into Storm Damaged Fields
- Tips for Planting Fall Forages and Other Salvage Uses
- Flying Turnips or Rye into Corn or Soybeans
- Making Silage? Protect Your Investment for the Long Term
- Great deal of information regarding forage options (mostly related to drought), but good info. to sift through at: http://droughtresources.unl.edu/corn
Planting Cover Crops into Storm-Damaged Fields
A common question lately has been “I’m considering planting cover crops into areas of corn and soybean fields with hail damage. What are my next steps?”
First, it’s important to consult your crop insurance provider to determine if you can do anything before the adjuster examines the field.
 In some areas hail stripped corn and soybean plants to the ground, leaving just stems standing. Cover crops offer an opportunity to rescue nitrogen already in the field to achieve other goals.
Next, look at your cover crop options, based on potential herbicide carryover from the previous crop and what your end goal is for the cover crop.
Herbicide Carryover
Herbicide carryover from the corn or soybean crop also can be a concern. Check out the herbicide carryover replant options in UNL Extension’s Guide for Weed Management with Insecticide and Fungicide Information on pages 160-171.
To determine if herbicide carryover is a concern for your fields, first check the herbicide label(s) for potential problems. If a rotation (waiting) interval is a concern, contact the chemical manufacturer and explain your conditions. Although the label is the law, companies have conducted extensive research on their products. Sometimes, they can give you a percentage survival chance for planting a crop within a cropping interval. Producers will assume the risk if the germination of the next crop is severely affected, but it may be worth a small calculated risk to potentially get a cover crop established.
Home germination tests also can be conducted. (Planting delays with cover crops, though, may be a concern). Simply take soil samples from the hailed fields and place into containers such as plastic cups with holes in the bottom. Plant about 20 seeds per cup of whichever cover crops you are interested in and wait 7-14 days to determine percent germination. If you don’t have seed, check a cover crop seed supplier to request some free seeds for testing.
Select Seed to Match Your Need
Know what your goal is for the cover crop in order to determine what to plant. Do you want to capture the nitrogen already in these fields? Both legume and non-legume cover crops can capture soil profile nitrogen in their plant tissues for release in subsequent seasons. Late summer or early fall seeded cover crops favor the brassicas (turnips; oilseed radishes including Tillage Radishes®; and canola) for nitrogen trapping for the next crop. Oats make a good complement to seed with the brassicas, since the oats provide quick, weed-suppressing biomass while taking up excess soil nutrients. These plants can survive a light frost and keep on growing.
If reducing compaction is your concern, turnips may help with surface compaction while radishes provide a longer taproot to work through deeper compaction.
If forage is needed for haying or grazing, good choices would be winter annual grasses such as cold-tolerant “winter” oats, cereal rye, winter triticale, and winter wheat. Winter legumes such as yellow sweetclover and winterpeas also may be included in a mix with winter triticale to increase protein content; however, these legumes will need to be planted before early September to provide grazing benefits.
Corn and soybean fields also can be used for forage instead of grain. Silage is probably the best option when the moisture drops to 60%. Currently, the immature hailed corn fields are still about 80% moisture, so producers will either have to wait for the crop to dry or mix dry forages such as straw with the wetter silage in the right proportion. Conversely, if the plants get too dry, it will be hard to pack the silage. To check the moisture, harvest several stalks and chop into smaller pieces with a corn knife, and then test for moisture content. Usually, the feeding value of immature, hailed silage is similar to prairie hay based on nutrient content.
Grazing the hailed fields is another option. However, acidosis may be a concern if cows graze primarily on the immature ears. Cows should be fed some grain for a few days prior to turn out on the hailed fields to help their rumens adjust to a higher carbohydrate diet.
Haying and earlage also may be options, but forage curing is difficult with the cooler days, especially if ears don’t dry well on damaged stalks. Bruce Anderson, UNL Forage specialist, says that it takes 10-14 days longer to dry the damaged corn stalks after crimping than drying cane hay. So, the risk for mold potential on the forage is higher than moving the forage into silage.
Thanks to Todd Whitney, UNL Extension Educator, for his contributions to this article!


